Showing posts with label leopard mani. Show all posts
Wednesday, November 6, 2013
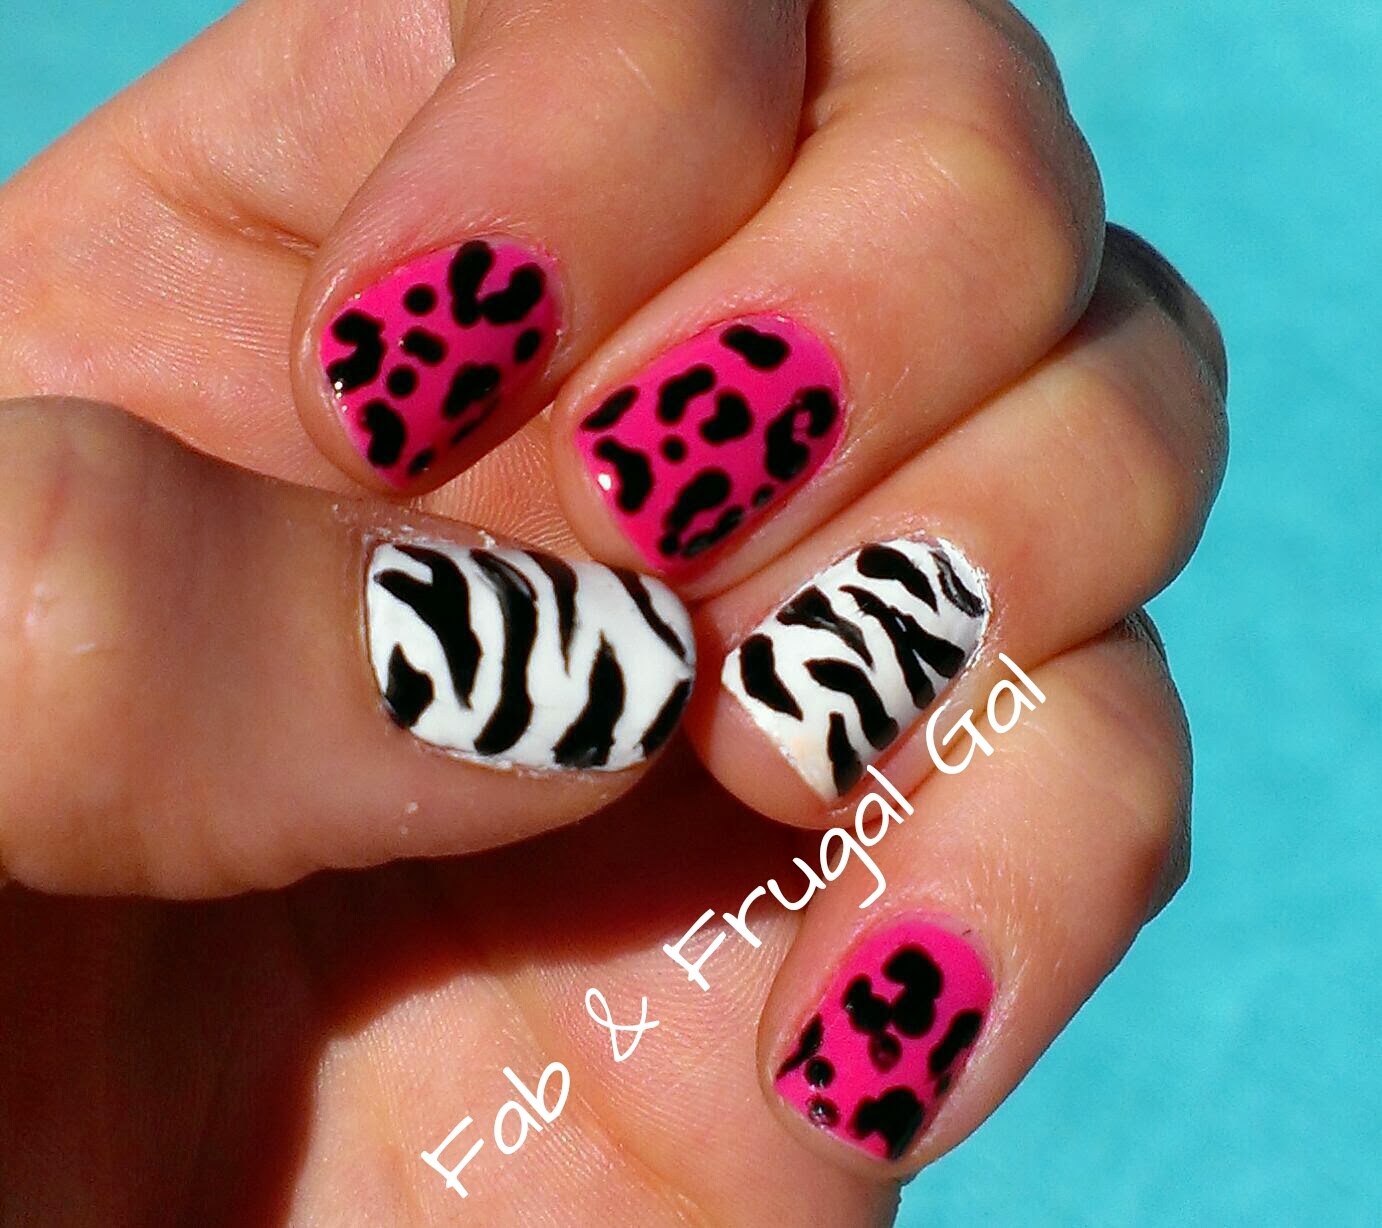
Leopard Zebra Mani
I like this fun bright manicure. I know it's the middle of fall and I should be dusting off all of my dark colors but I decided to brighten things up and go with this one.
I have been playing around with regular nail polish these days. It's easier to take off than the gel and I have so much time on my hands these days due to my knee surgery. Anyway hope you enjoy this easy cute mani.
What you will need:
- Top and base coats
- Pink polish
- White polish
- Black polish
- Dotting tool
- Thin nail brush
Start by prepping your nails like you normally would (file, clip, etc.)
Paint your index, middle, and pinky fingers pink and your thumb and ring finger white. Let dry completely.
On the pink fingers, add a few black dots using your dotting tool.
Then create little "C" shapes around the dots in a random pattern.
On the white fingers, paint thin black strips to make a zebra effect.
Finish with a top coat and enjoy! Have fun trying this with different color combinations.
Tuesday, September 17, 2013
Gold Leopard Mani
Tired this one on a fried of mine a few days ago. I didn't post tutorial photo's because this one is similar to the one I did a few months ago. Here's the link if you want to reference it.
The main difference on this one is I used a powder glitter instead of a glitter polish on the glitter nails.
Thank you Jaycy for being my hand model this time!
Friday, August 30, 2013
Leopard Tri-Color Mani
This week I decided on a fun multi colored leopard print mani. I used a Pinterest picture as inspiration but the link was dead so I can't give the person credit. I also added my own spin on it to make it a little different.
The leopard spots are extremely easy to do and I love how they turn out. This is a fun mani for those who are just starting out!
What you will need:- Top and Base coats
- Black polish
- Teal (or light blue) polish
- Light Pink polish
- Dotting tool (or bobby pin but dotting tool works best)
- Foil or something similar (I use the top of a vitamin bottle so I can reuse it)
Start by prepping your nails as you normally would do (cut, file, etc) Next, paint your pinky and index finger with the black polish. Paint your ring and middle finger with the teal polish. Paint your thumb with the pink polish.
Next, we are going to create the spots. Dab some of the pink polish onto your foil. Use the larger end of your dotting tool, dip the ball into the pink polish so that we can create large non-perfect dots onto the ring and middle fingers.
Repeat the same steps for your thumb but instead of using pink, use the teal color. What we are doing is creating an offset effect with the colors.
Now we are going to finish the spots by adding black accents to the nails. Using the smaller end of the dotting tool, create small "C" shapes around the circles. Add a few small random dots in between the pattern. Repeat the steps for the thumb nail and the teal colored nails (ring and middle finger).
Last step is to paint with a top coat and you are all done! Rock that awesome mani :) Try playing with different colors to see what you like best.
Subscribe to:
Posts (Atom)


